
Drab to fab play kitchen table!
A couple of years ago I was looking for a cute little play kitchen table in our playroom, and realized that I had just the thing…an old end table that we weren’t using anymore was just sitting gathering dust, and needed to be put to good use. So, I sprayed it white, and called it good. Fast forward those couple of years, and this poor table had been through the wringer. It desperately needed a fresh coat of paint, and a little pep put back into it. I’m also finally starting to decorate the playroom, so this would be one of the first projects to get me up and running. I LOVE how it turned out!
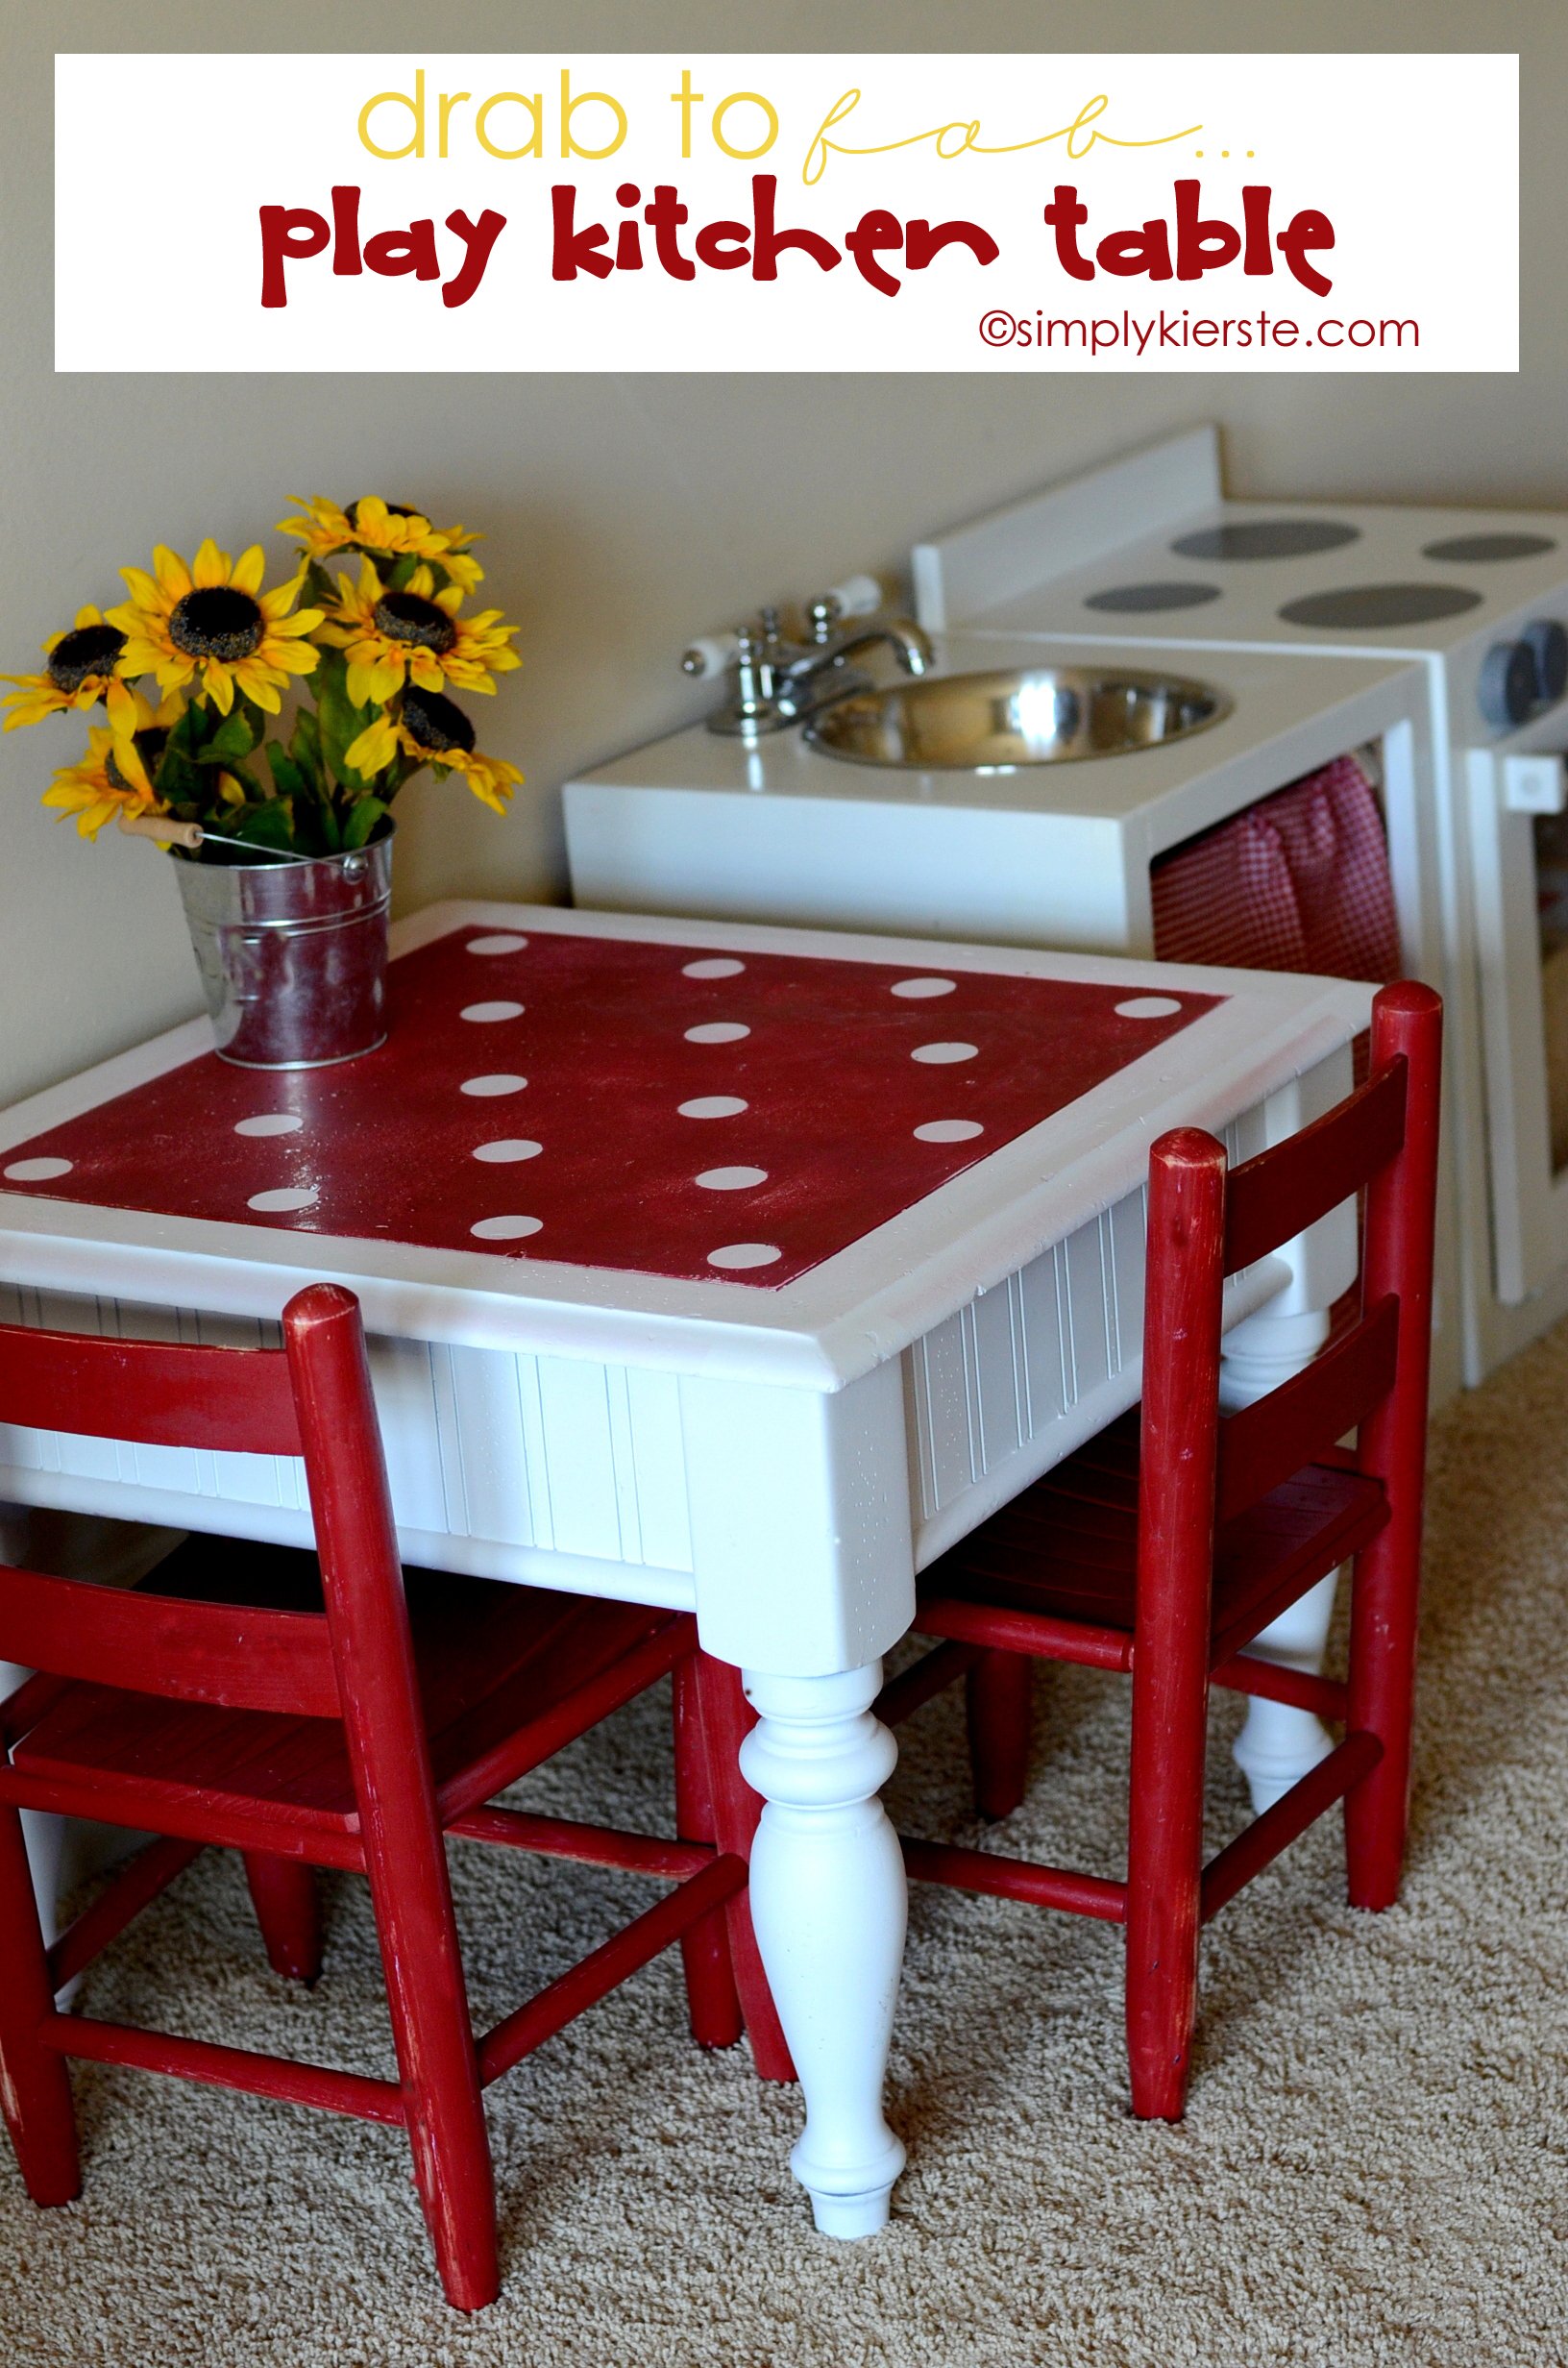
The top of the table had a groove around the edges, creating a big square directly in the middle of it. Since I’m totally obsessed with polka dots, and think it’s super fun for a playroom, I used that square to create something that would really add some charm and detail. The color theme for the whole room is red, white, and navy/denim, and since the chairs were already red, I went with red on top to tie it all in together.
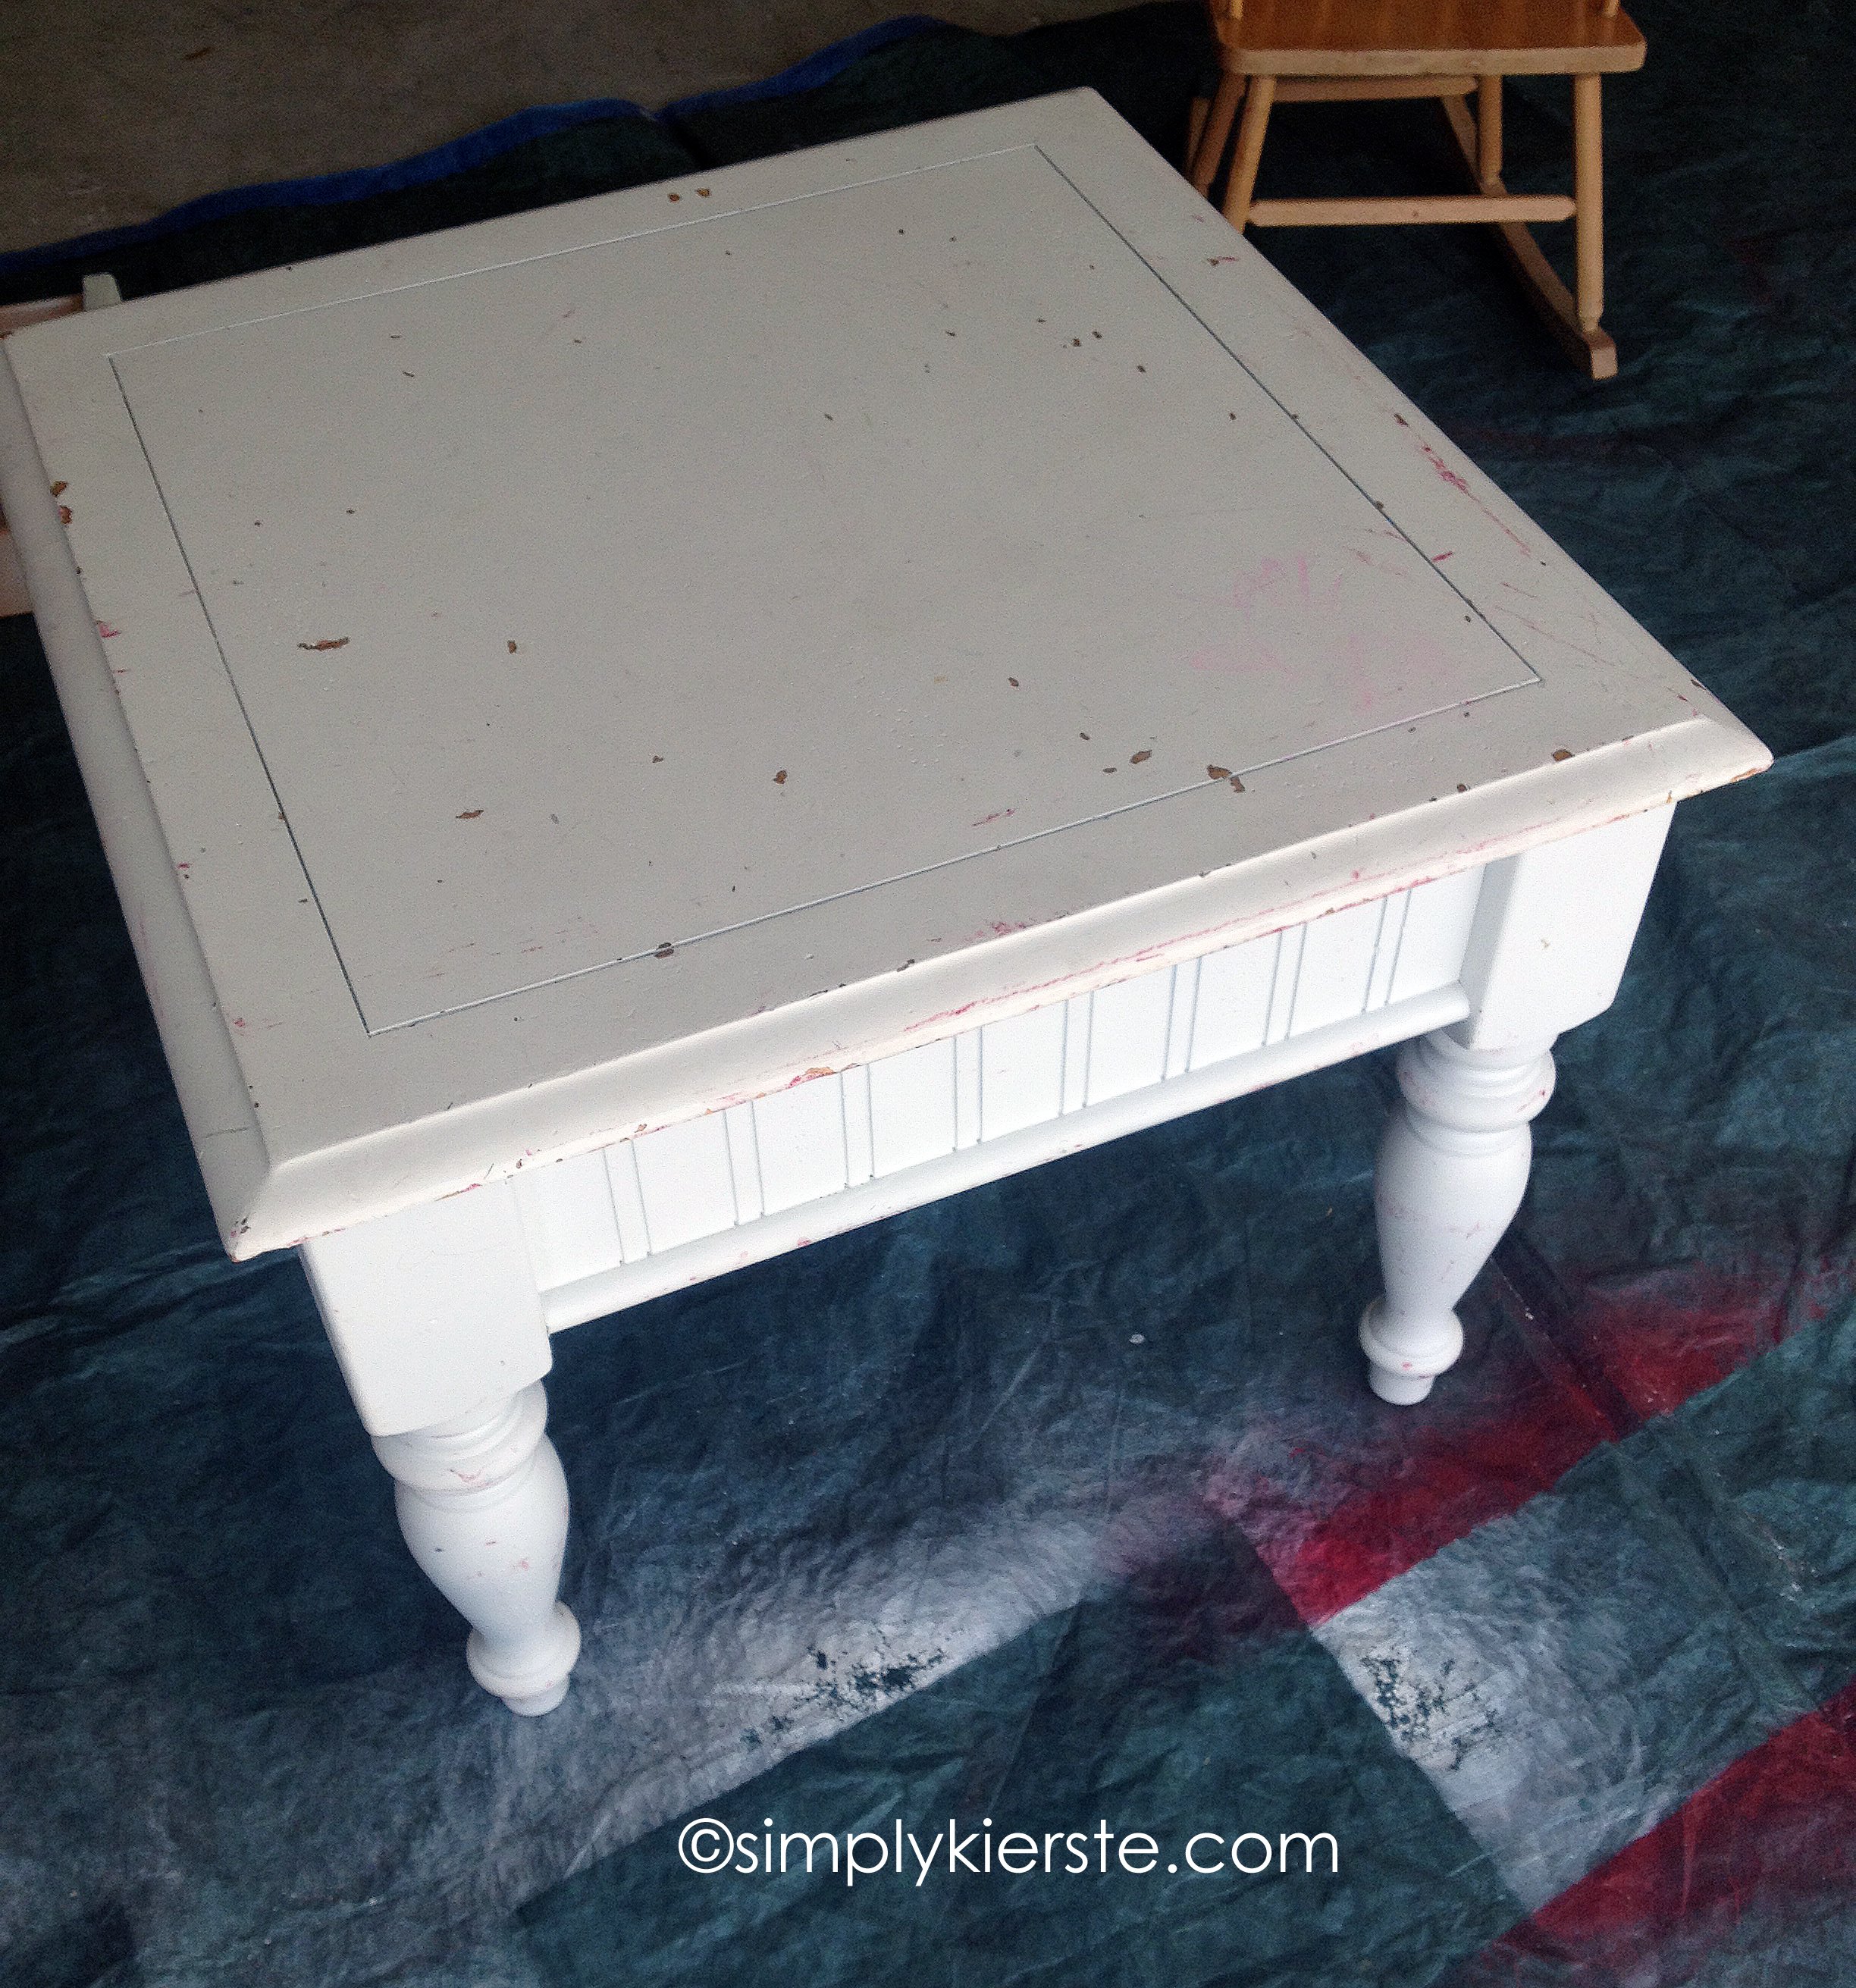
Best of all? This little makeover only took one day, and the vast majority of that was drying time. I thought about using chalk paint, but honestly, I didn’t want to spend a lot of time or effort or money on this piece. I can guarantee you I will have to re-do it again in another couple of years, due to six very active children that love to play…and play hard. ☺ I went with my old favorite stand-by–Rustoleum spray paint.
See how nicked and marked up it was? A quick sand across solves some of the unevenness. I used Rustoleum white–paint + primer on the entire table, and let it dry completely. I love using the paint and primer–it saves an extra step!
While the paint was drying, I used my Silhouette to cut out 1.5 inch circles. No need to bother with the transfer paper–I was just going to peel them off and stick them on. Once the paint was totally dry, I taped the edges off with Frog Tape (my favorite!), then added the polka dots–being sure to adhere them really well.
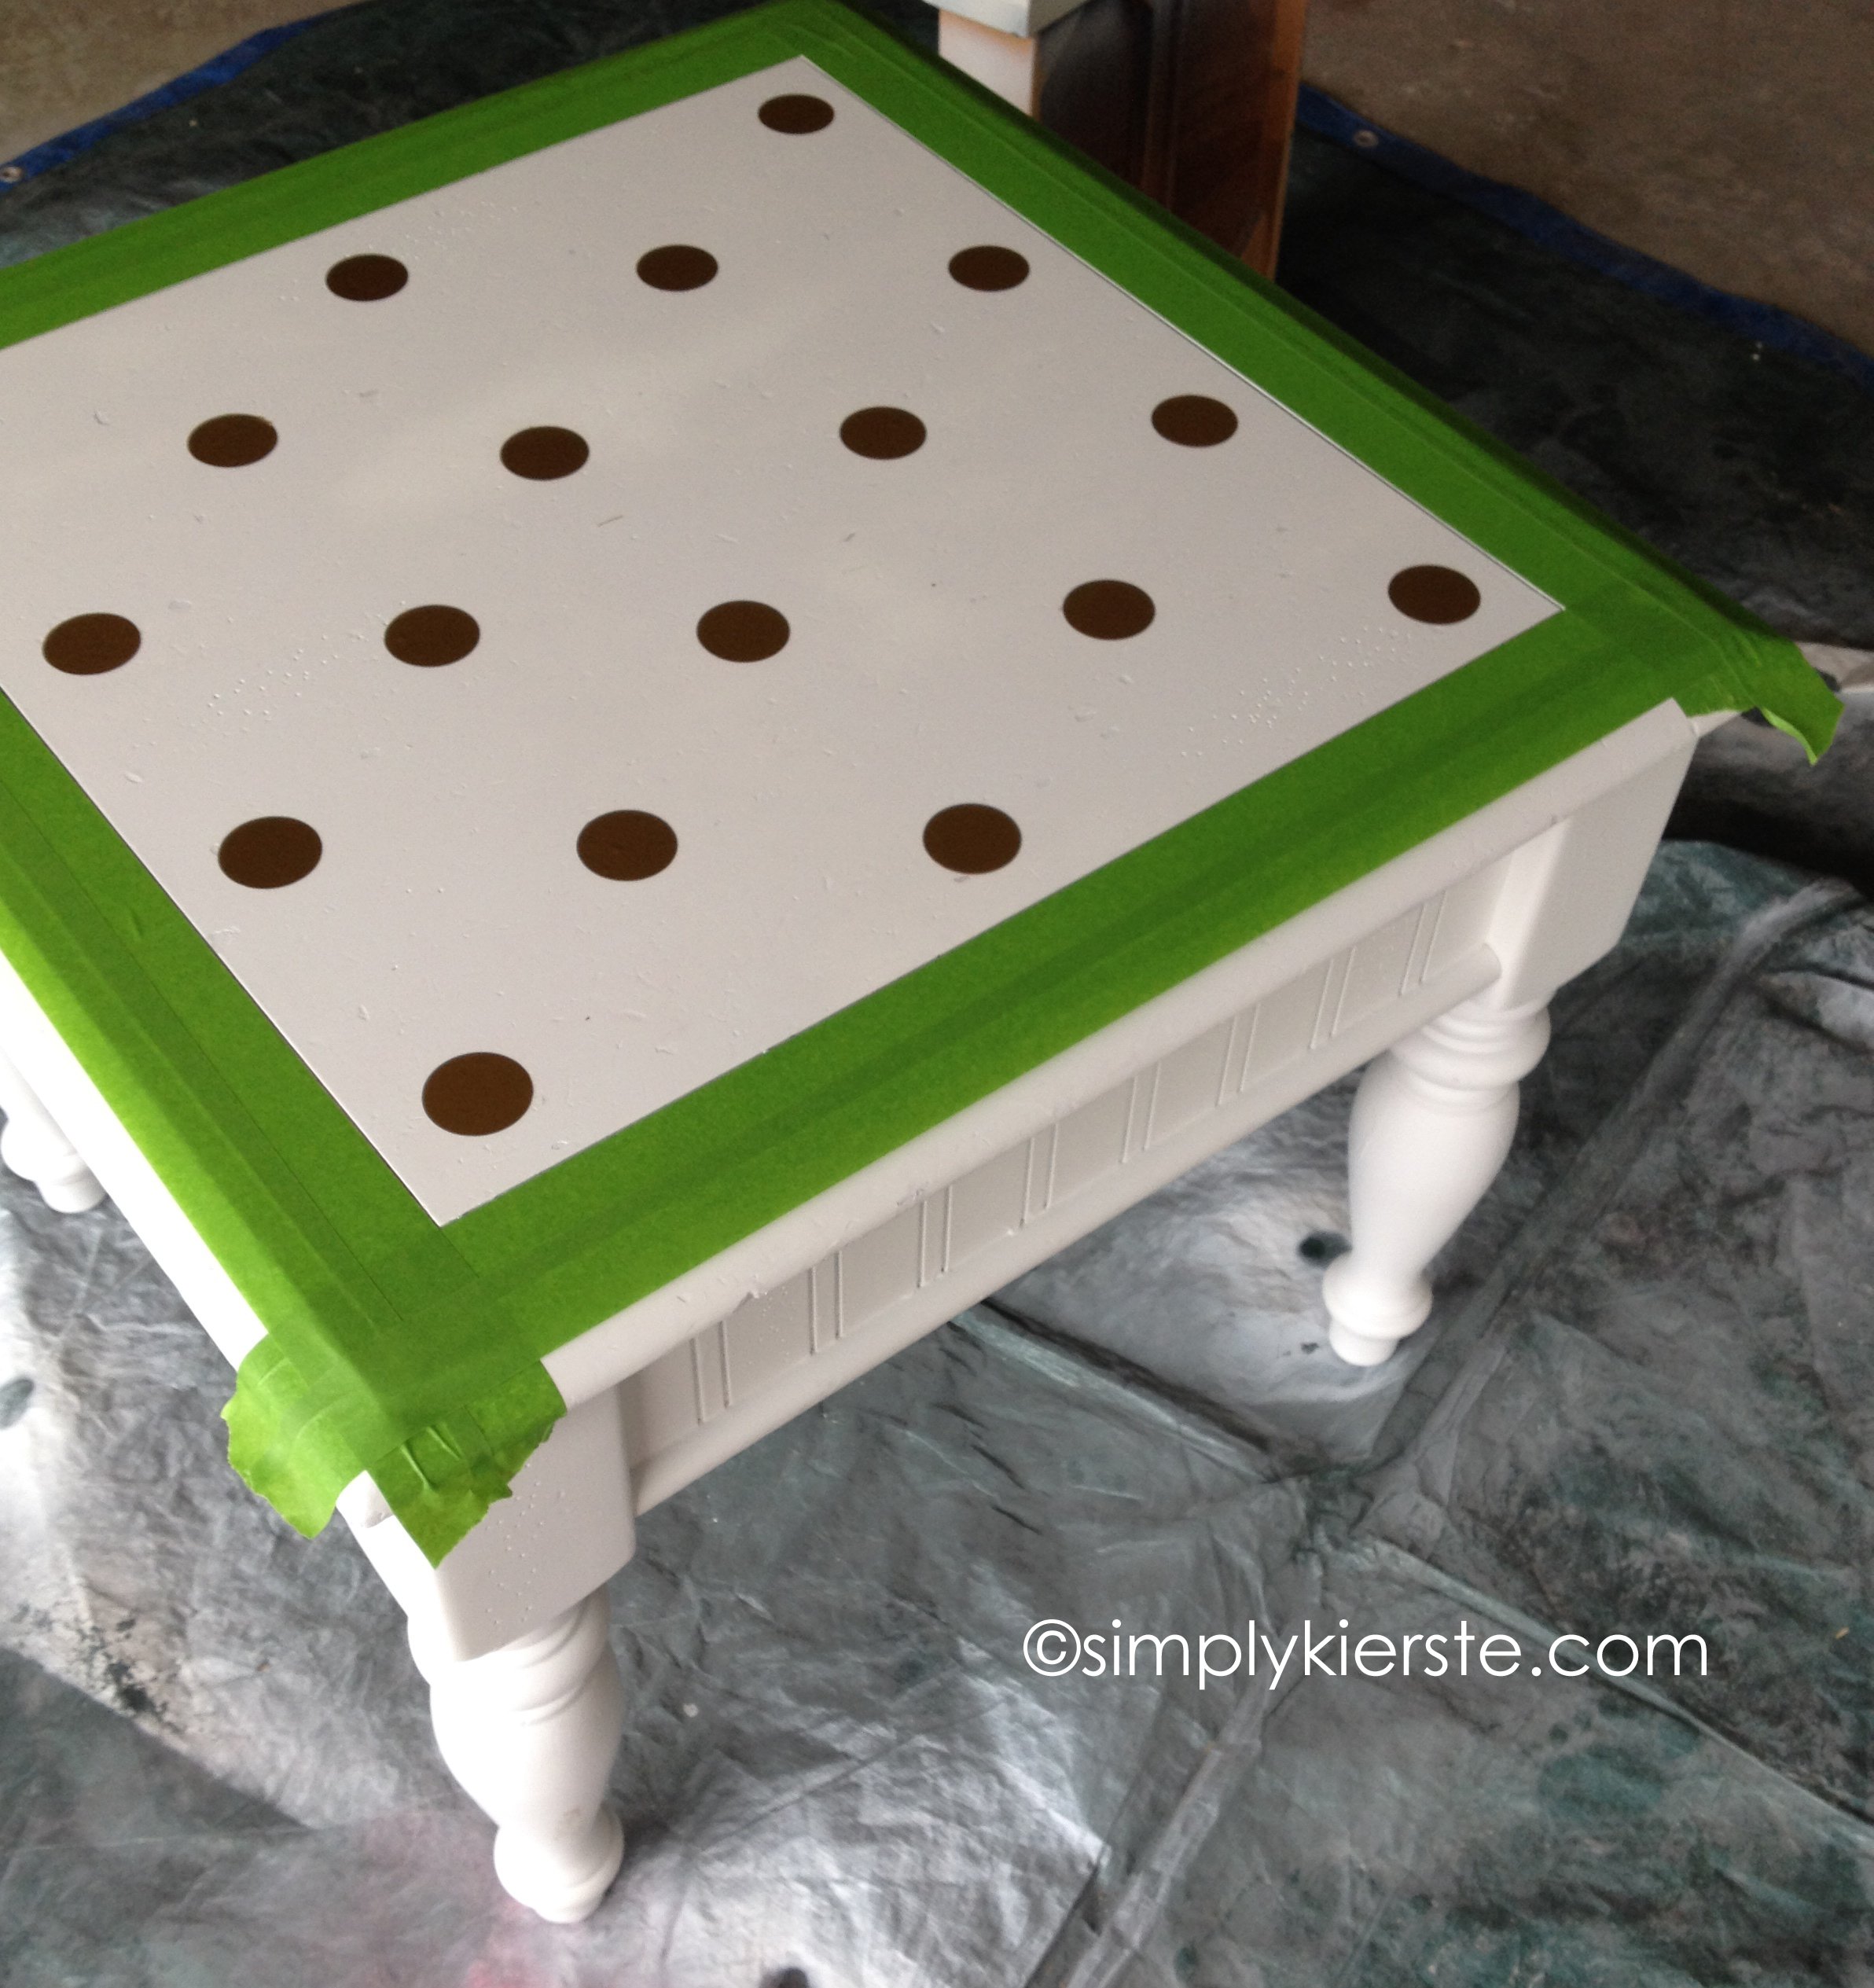
I sprayed the top red, and let it dry, then peeled off the tape and circles. I took my power sander to the top–I like more of a distressed look, and the paint was a little glossy for my taste. I like some of the white showing through!
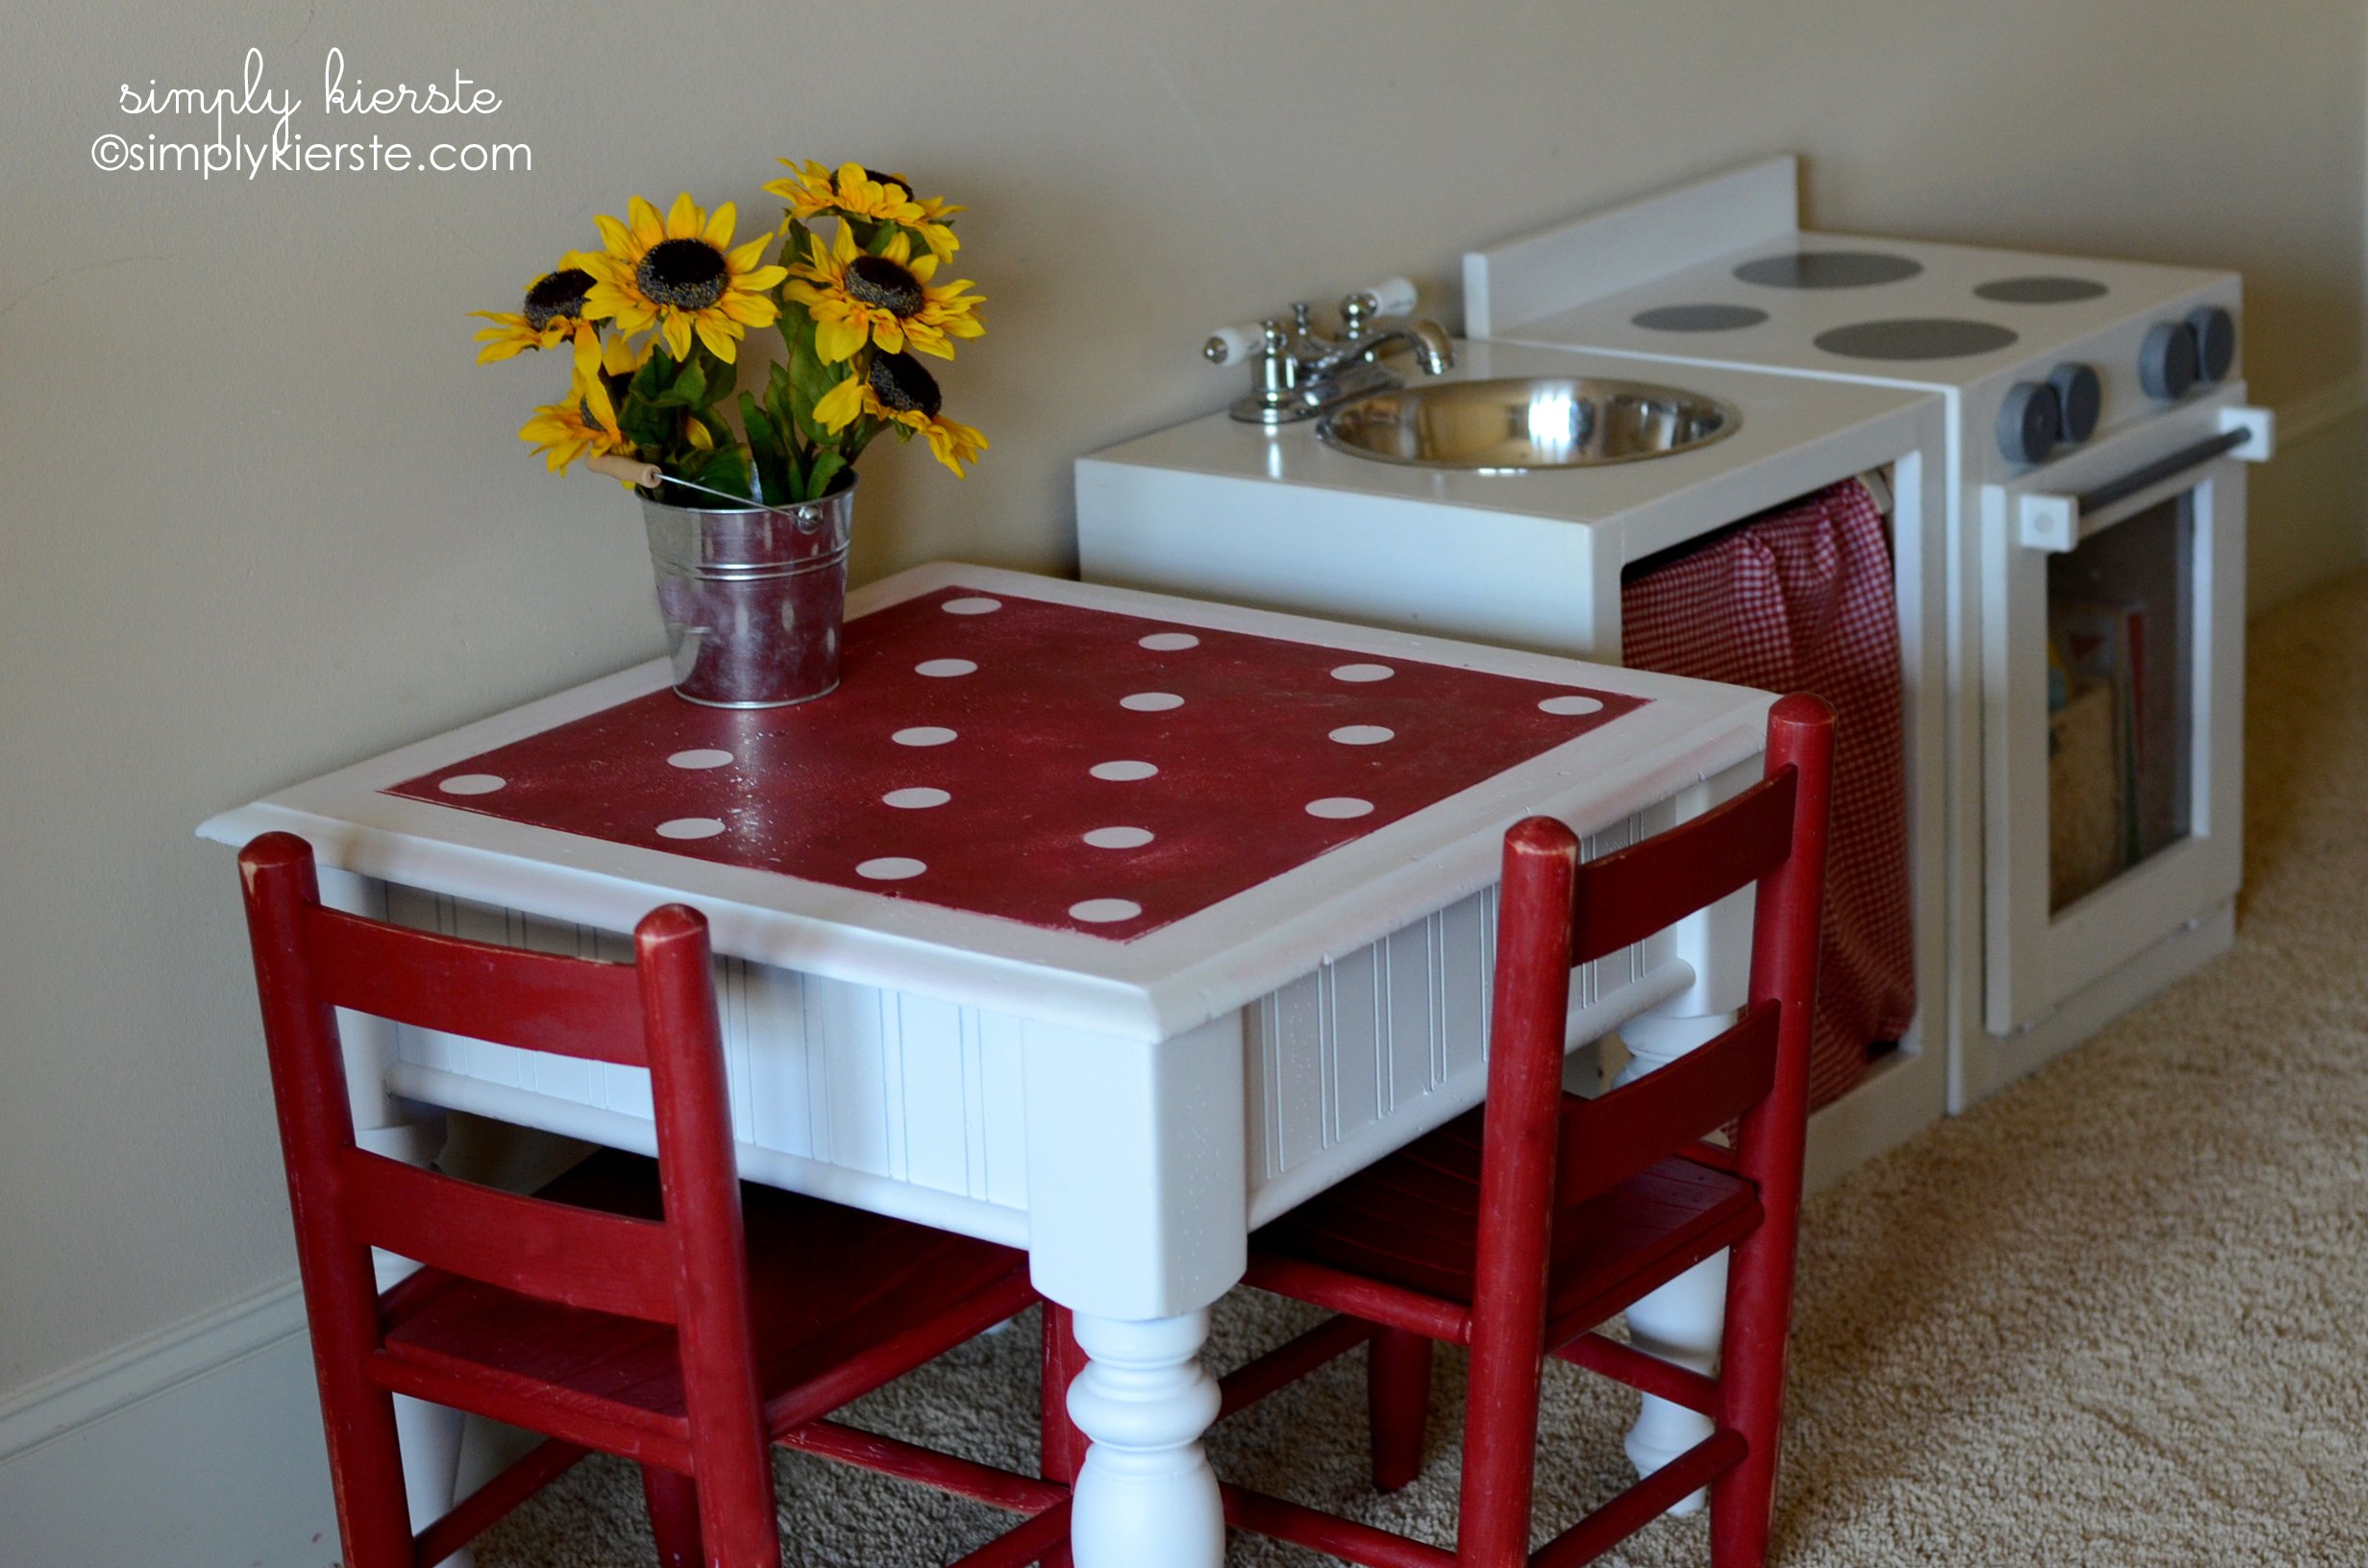
It’s perfect!! It was so easy, and a darling focal point for the play kitchen! I’m excited to finish a few more projects for this space…SO fun!

How adorable! I love it! I have some end tables hanging around that I could totally do this to! Thanks for sharing!
You are so welcome!!! Thanks for dropping by!!! xo
Too adorable!! I love the red with white polka dots!!! Super cute!!
Thank you, Crystal!! xo
This table is absolutely adorable! You have actually inspired me to do this to an end table I have in out Buckeye family room! It is just so boring and I think I will do this same thing using scarlet and grey color…Thank you!
I’m so glad! You’ll have to send me pics when you’re finished! :) Thanks so much for stopping by!! xo
Hi Kierste! Since Facebook is notorious for not letting page owners know when I tag them, I thought I would stop by myself and let you know I featured this post and my readers loved it! https://www.facebook.com/CraftsbyAmanda/photos/pb.323548680216.-2207520000.1397173019./10153988903525217/?type=3&theater
Thanks for letting me know, Amanda!!! xo
SOO darn CUTE!!!
I’m very interested in how you made the sink and oven too. My granddaughter wants it so badly and I’m not interested in “The plastic ones you see in stores.”
Can you help me with “How To”, Pretty please?
We made that years ago, before I started posting tutorials! I can give you some pictures, and a basic outline of how we made it, if that works! Another idea that’s super cute is to turn an entertainment center into a kitchen, and it might even be easier! http://www.diynetwork.com/decorating/how-to-turn-an-old-entertainment-center-into-a-play-kitchen/pictures/index.html
I want to make a kitchen for my grandson. Could you please send me some pictures, and a basic outline of how you made the stove and sink like you did for Sherry? I really appreciate it!