
DIY Bathroom Mirror Frame
Upgrade your builder’s grade mirrors and update your bathroom by building frames to go around them. This simple and easy project will totally change the look of your bathroom, and spruce up your space!
We put builder’s grade mirrors go in when we were building Old Salt Farm, knowing that framing the mirrors would be on our list to do once we moved in, and it would save us a lot of money. They are finally finished, and I’m in LOVE! It’s completely amazing the difference that just adding these easy framed mirrors will make in your bathroom. If you’re looking for an inexpensive way to update your bathroom, framing your builder’s grade mirror is a great place to start!
Before…
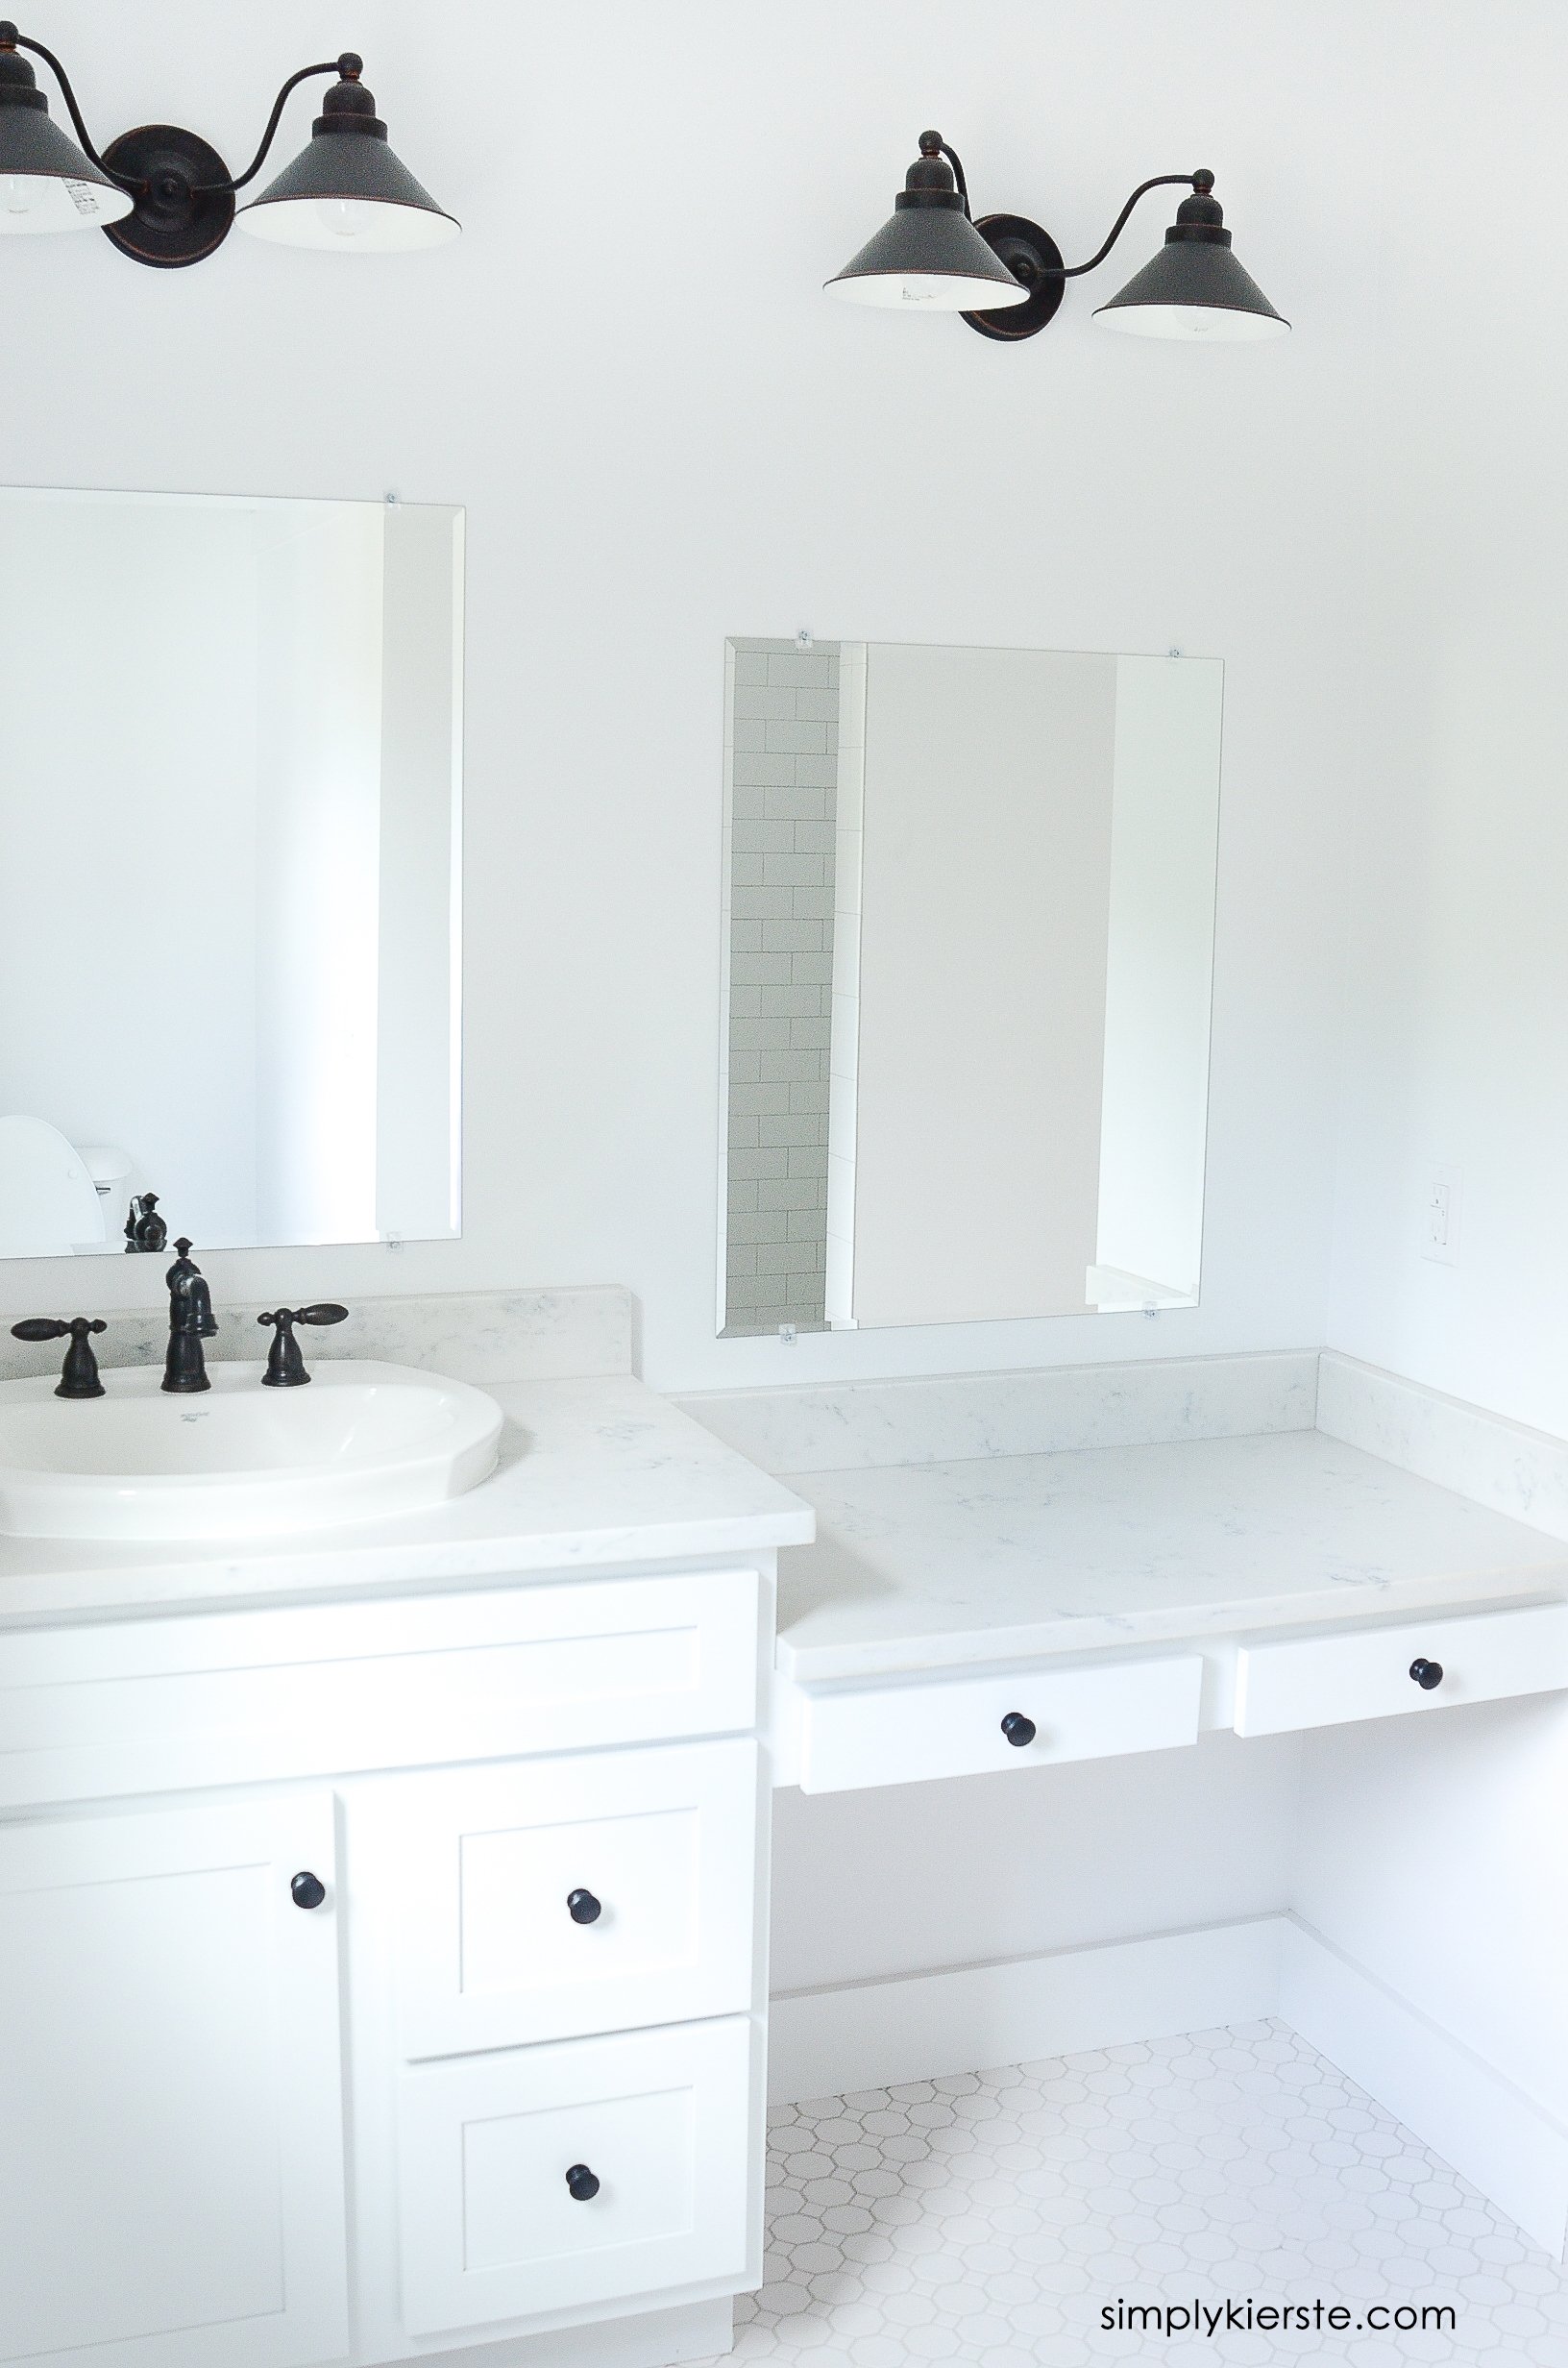
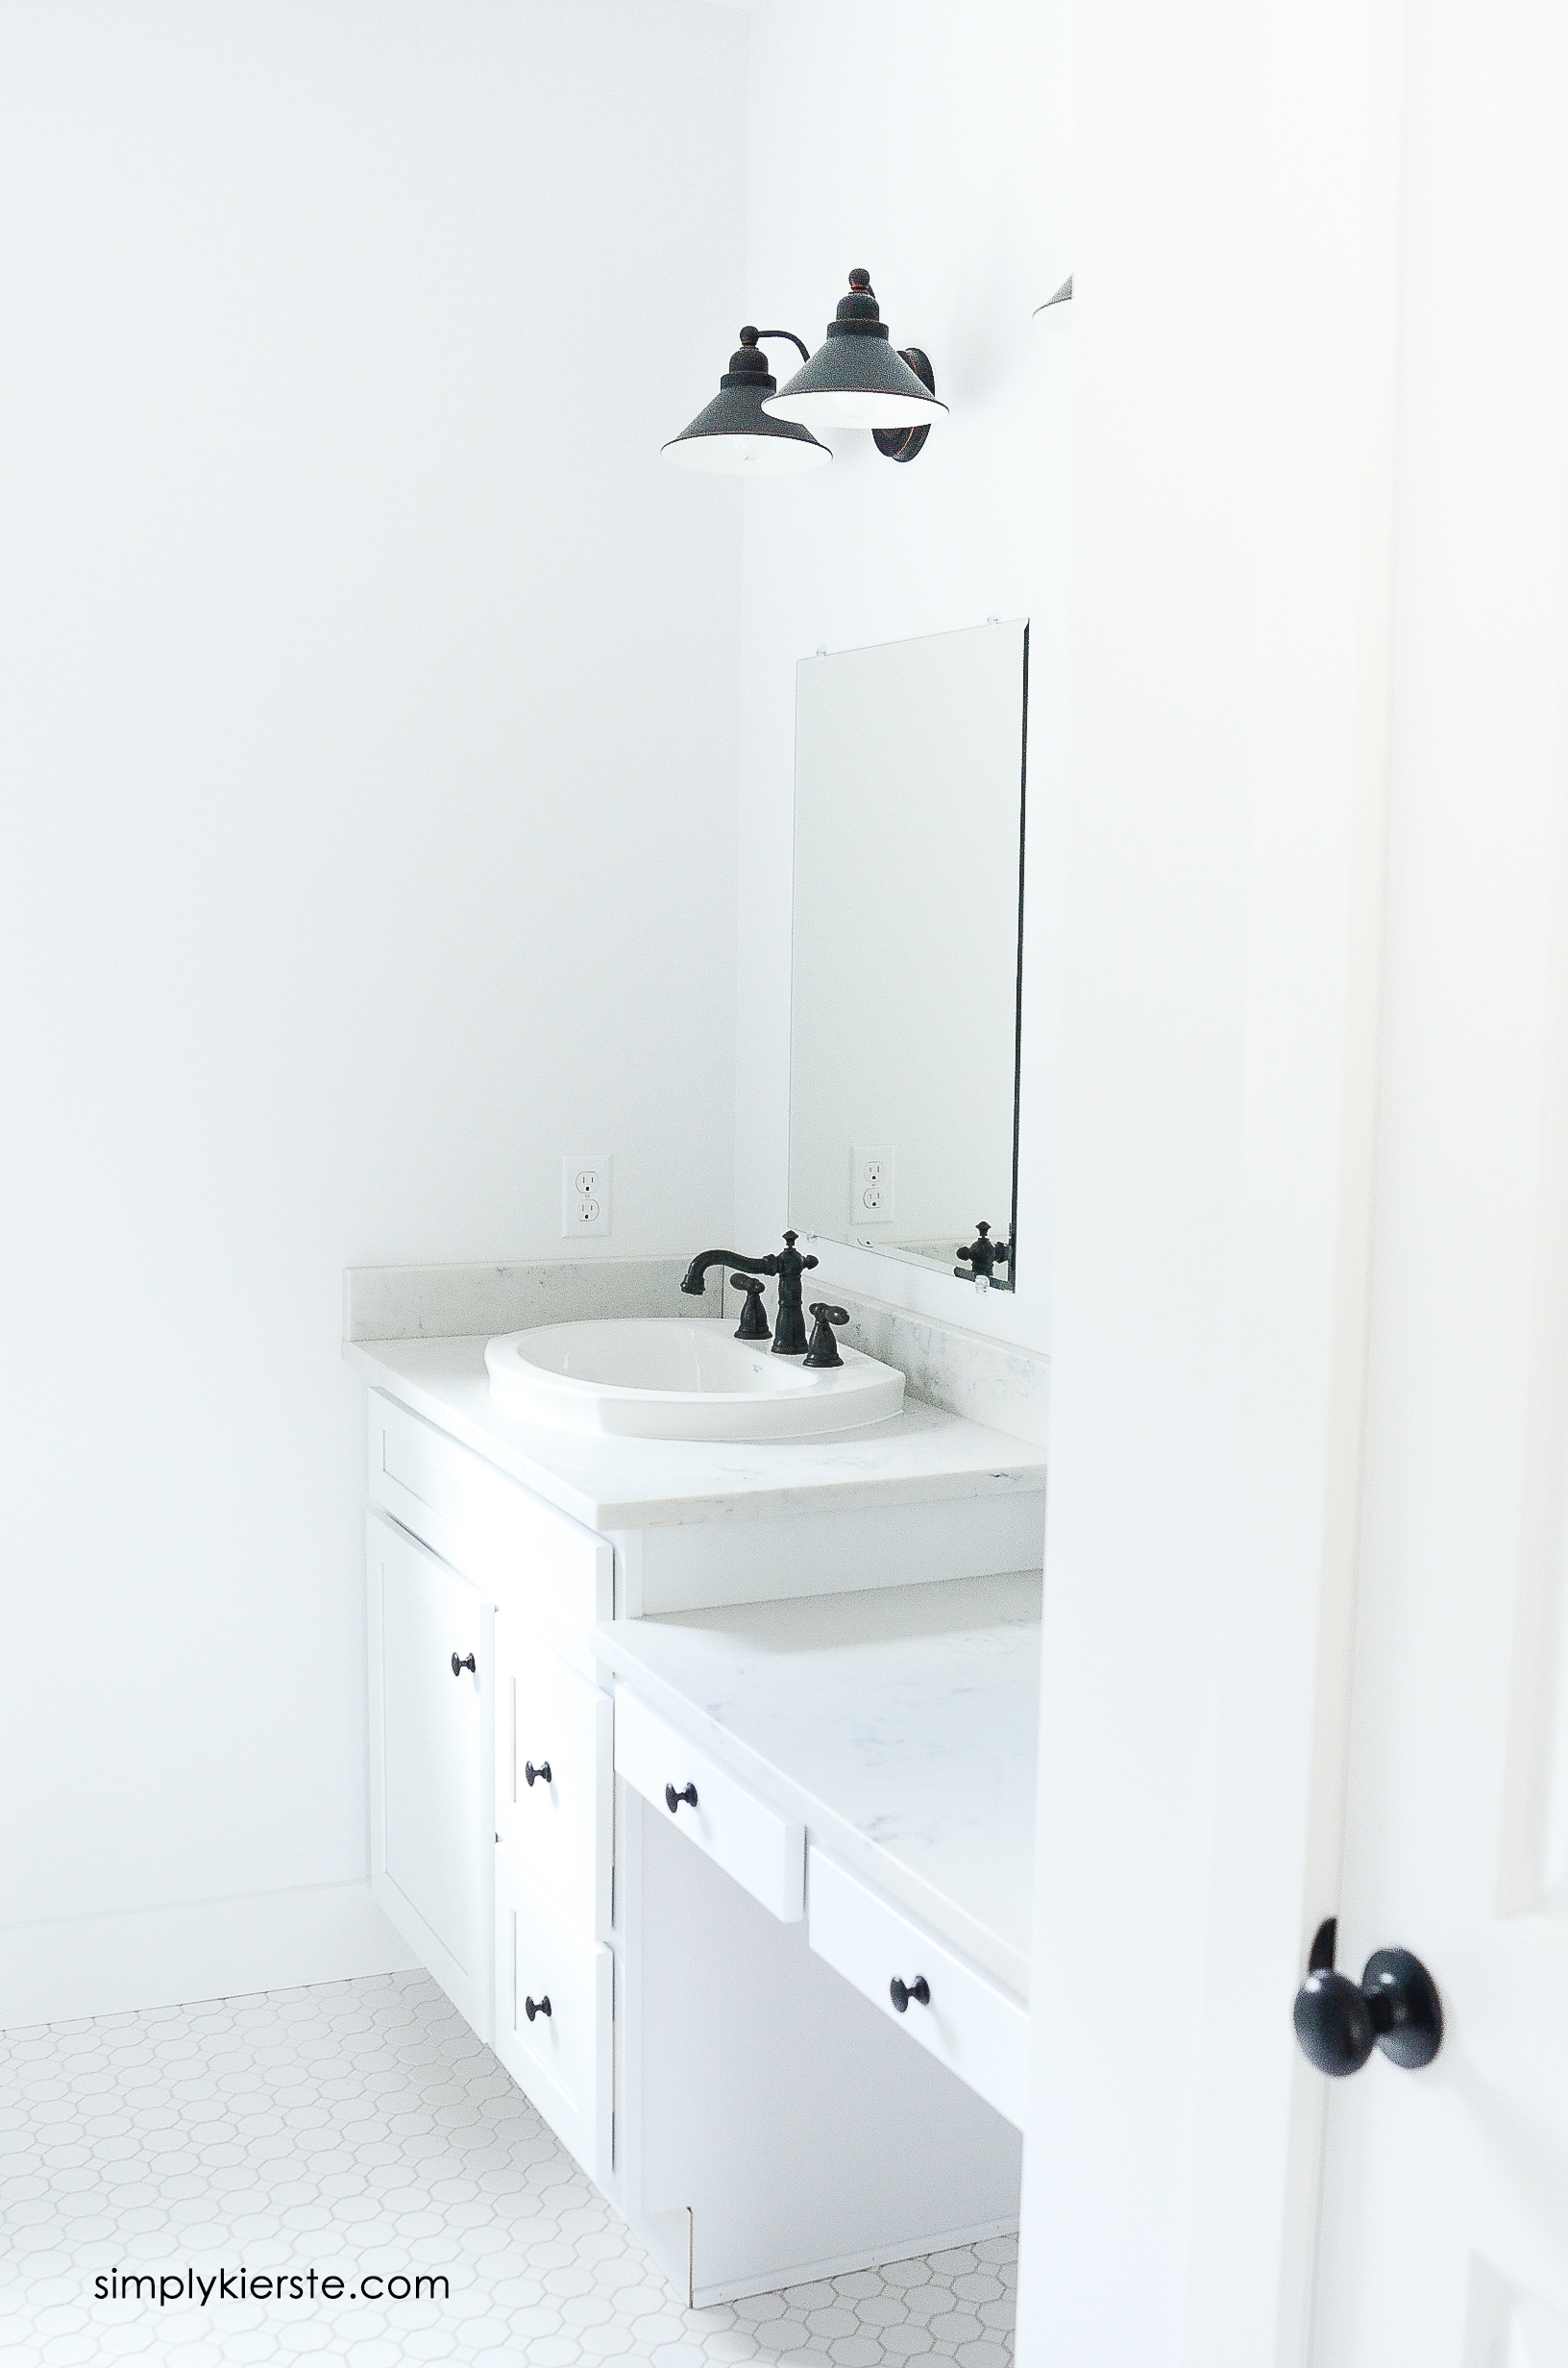
And here’s the after…
Can you believe what a difference they made in this space?
This ended up being about a 1-2 day project, but only because we had to wait for both stain and paint to dry. If you’re just staining or just painting, it will be a little faster. The cost is very reasonable–less than $20 for each bathroom.
FRAMED BATHROOM MIRRORS
NOTES:
-I used 1×4’s (which are really about 3.5 inches) because my mirrors aren’t very big, and any wider wood would take up too much of the mirror. If I had a really large mirror, I would have done 1×6’s instead (around 5.5 inches wide).
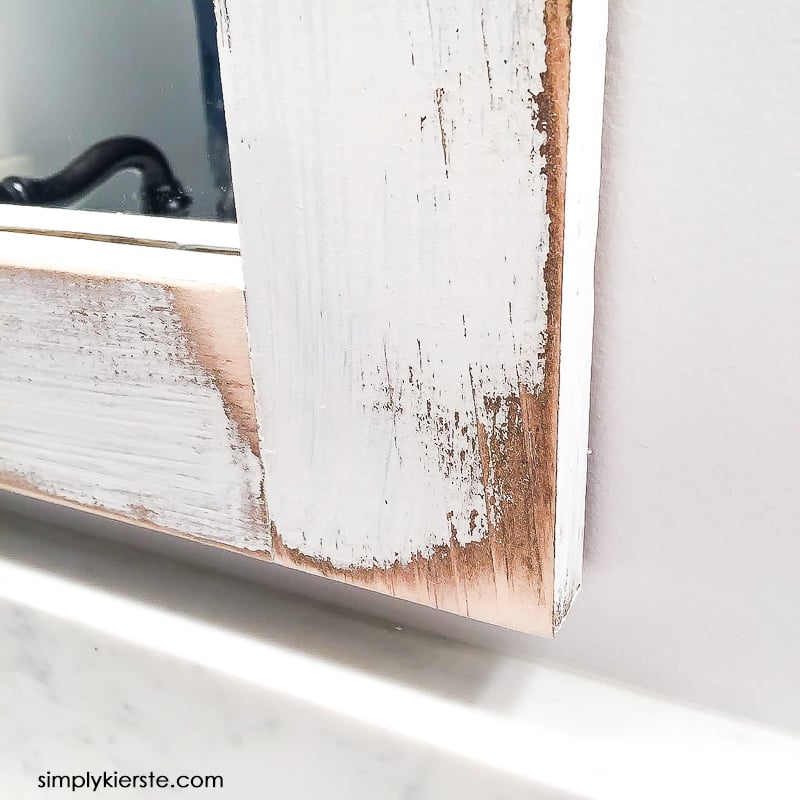
-Some of them I stained only, and others I stained, then painted white and distressed with my sander. You can do anything you like–colors, stain, etc.
-You can miter the edges of your wood so that they meet diagonally in the corners, but I like mine straight instead. It’s also much easier to do it that way.
-The wood sits directly on top of the mirror, not to the side of it.
SUPPLIES:
-Wood, cut to length (I used 1×4’s)
-Paint & supplies (I used leftover wall paint: Decorator White by Benjamin Moore)
–Stain (I used Minwax Provincial)
-Liquid Nails, Construction Adhesive
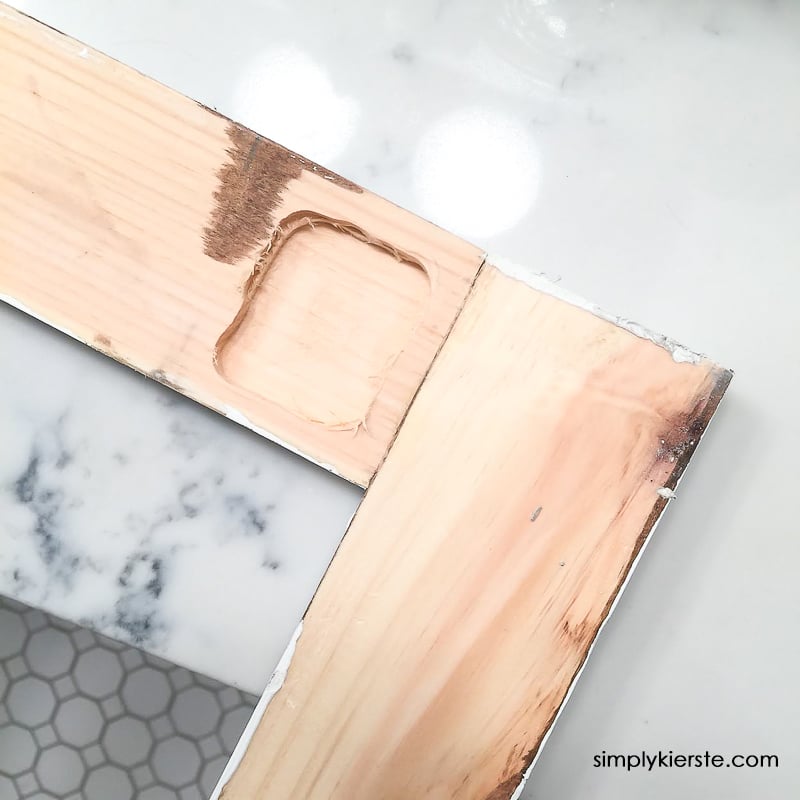
-1/2 inch straight bit to cut out a space to go over the plastic clips holding up the mirror.
DIRECTIONS:
-Cut your wood to length. Measure the sides first, which is basically just the height of the mirror. The top and bottom pieces will be cut to fit the remaining space in the middle. For example, if your mirror is 20 inches tall and 20 inches wide, your side pieces would be 20 inches, and the top and bottom pieces would be 13 inches each. The side pieces will each have a width of 3.5 inches, so a total of 7, which you subtract from the mirror width of 20. Just make the number changes for a different size frame and wider wood.
-Paint, stain, sand, etc. I made frames for four bathrooms–two I left stained, and the other two I stained, then dry painted white, and sanded to get a distressed look.
-Use wood glue to attach the pieces of wood together to make your frame. You can use nails too, but we decided not to, because it really was only to hold it together temporarily until we got it up on the mirror.
-Hold up your frame directly below where the clips sit, and make a mark. This will tell you where to cut out a section on the back of your frame. In our case it was the top and bottom pieces, but depending on where your clips are, it could be the side pieces. Use a compact router to cut out a hole of the back of the wood, so that it will fit over the clip and flat against the mirror.

-Apply Liquid Nails to tour frame
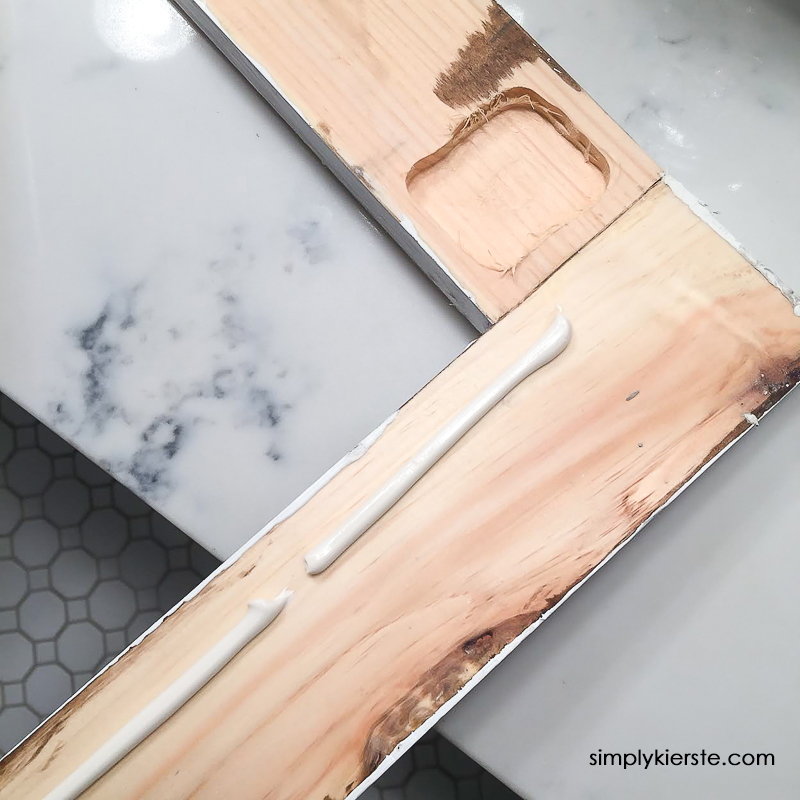
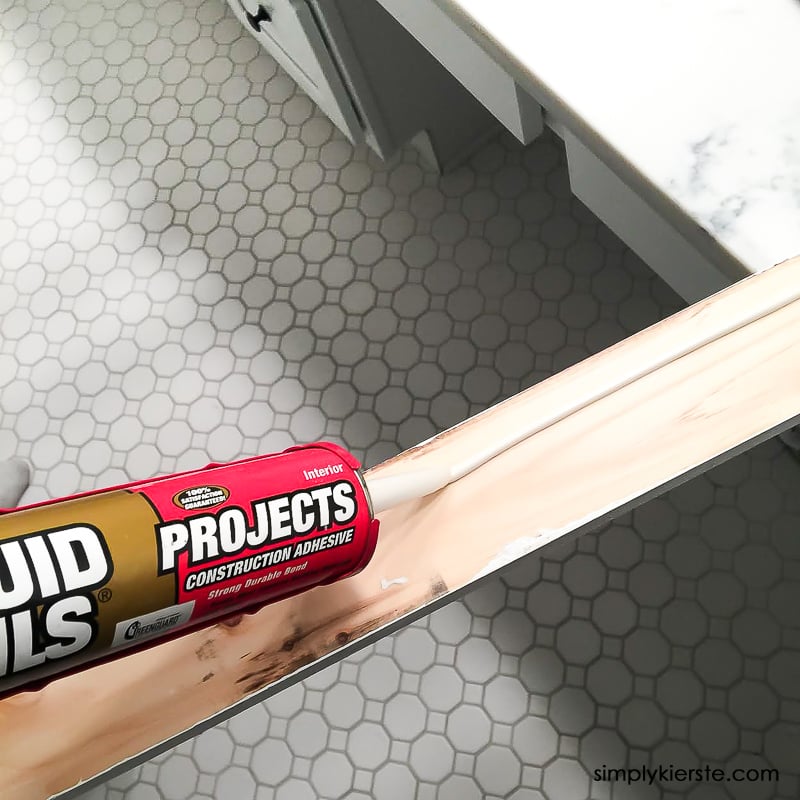
-Attach to the mirror, and quickly check with a level to make sure it’s perfectly straight. Liquid Nails dries fast, and it is not moveable once it is dry, so measure right away.
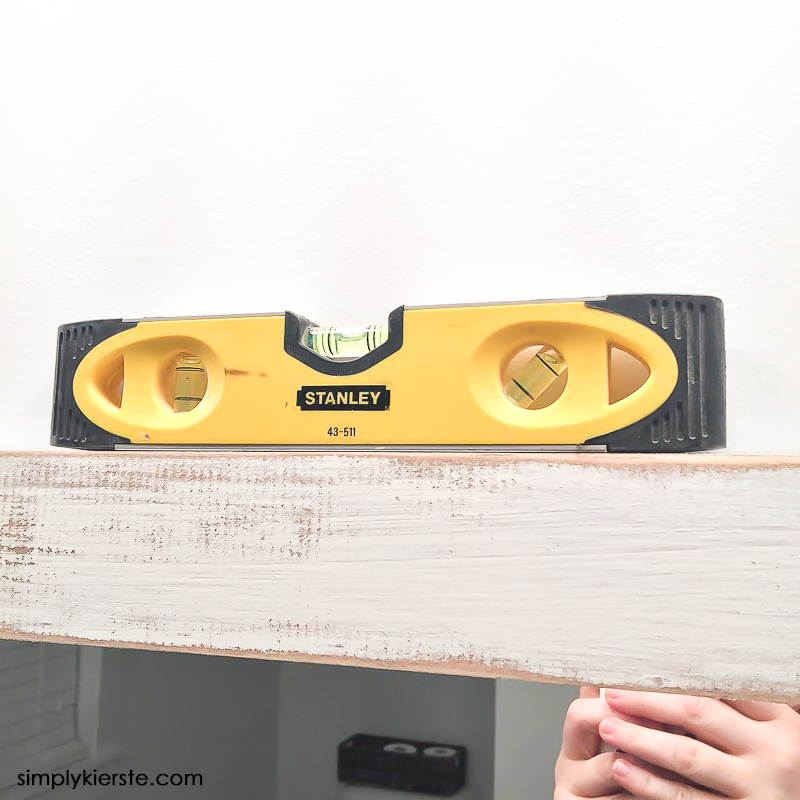
-Hold the pieces of wood in place for a minute or two, then slide a spacer (piece of wood, etc.) between the bottom of the frame and the backsplash or counter, so it doesn’t slide down while it’s drying.
FAQ:
- This is a beginner level project, so it’s a good one to start with, even if you haven’t done something like this before.
- If you don’t have the tools to cut wood, Home Depot and Lowe’s offer this service. Sometimes they’ll charge per cut, but I’ve also had them not charge me at all!
- This is a weekend project–even a day project–depending on drying time.
- Update: This project was completed nearly 7 years ago, in all the bathrooms in our home. They’ve help up extremely well over that time. Two of the mirrors had frames they came loose within that time frame, and we were easily able to re-glue and adhere them on again.
SOURCES:
Floor Tile (light gray grout)
Shower Tile (light gray grout)
Wall Paint: Decorator White by Benjamin Moore

Love it. Thanks for inspiring AND sharing the how tos with so many pictures!
Thank you so much…and you’re welcome!! :) xoxo
i love this, however If you glue the frame to the mirror (and over the clips) what happens if you need to take this off the wall?
You don’t. :) Or at least you don’t without ruining it. Once it’s on, it’s on, so you need to be sure that’s what you want to do.
Wow! I love the way this looks, and the frames look great. I love the light colors of this bathroom, and how clean the looks are. Thank you for sharing!
Thanks so much, McKenzie!! xo