
DIY Trick-or-Treat Buckets
The cutest DIY trick-or-treat buckets that you can make in no time!
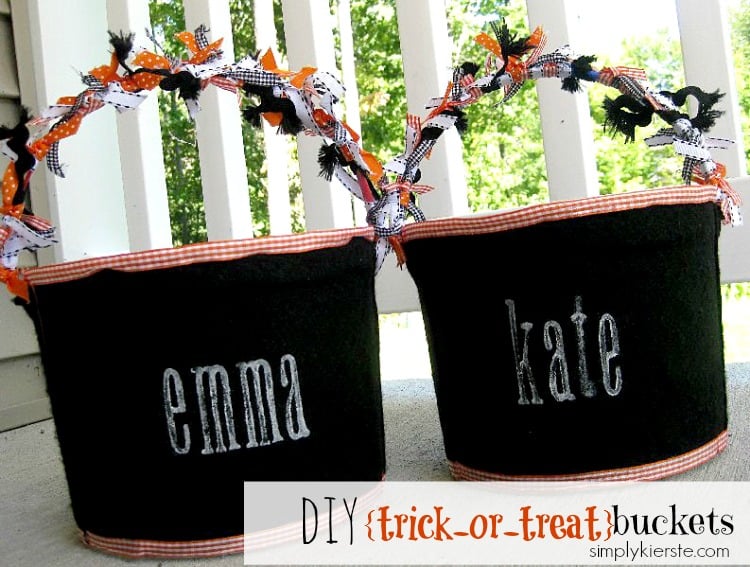
DIY TRICK-OR-TREAT BUCKETS
When I was thinking about how I could jazz up my girls’ trick-or-treat buckets, (I’m always looking for a good reason to use ribbon), when I stumbled across some empty ice cream buckets. It was meant to be! They are sturdy, have great handles, and are the perfect size for all those Halloween treats! I knew they would be adorable, and perfect for little hands to hold onto.
I also love anything personalized, and I know my kids love it too. Seeing your name is always fun! Best of all, they really are super easy and fun to make—they come together quickly too! I have a lot of craft supplies, so I used what I had, and you can do the same if you need to improvise to use what you already have on hand.
ITEMS YOU NEED:
- empty ice cream bucket, with a handle
- felt (I used 2 of the felt squares you can buy at Michael’s, etc. for each bucket)
- hot glue gun
- ribbon, about 5-6 yards per bucket
- foam stamps
- craft paint
DIRECTIONS:
1. Using the hot glue gun, apply the felt to the bucket. Trim where necessary.
2. Add ribbon to the top and bottom of the bucket, covering up the felt edges, and the top rim.
3. Tie ribbons along the handle.
4. Stamp desired name on the front using foam stamps. (Mine are the Philadephia font)
There you have it–the most adorable DIY trick-or-treat buckets ever! My girls absolutely love them.
P.S. If you have a boy or a girl that doesn’t love all the tied ribbon on the handle, you can always just use a hot glue fun to adhere a piece of ribbon (something textured and thick, like a grosgrain) flat onto the handle to cover it up.
Other fabulous ideas for ice cream buckets?
- Valentine’s Day bucket/mail box
- Easter basket
- organizing toys, art supplies, etc.

